Showing posts with label breakfast. Show all posts

Tuesday, November 13, 2012

Apple Cider Donuts - Tasty Tuesday!

I had one cooking goal this fall.  Well, one that's specific to this fall anyway: to make apple cider donuts.  I absolutely adore them, and it's one of those treats that I buy every year.  Why I haven't made them, I don't know.  I've made pumpkin donuts before, and they aren't hard... they just make a ton of donuts.

So this past weekend, I set out to make my donuts.  I was originally going to make the traditional round donuts with the holes in them until I realized that I prefer eating the little "holes" and that the round donuts are not my friend.  Yes, this is an easy recipe - and I made it dairy free so Little Miss could enjoy it, but it wasn't originally so (see notes for the changes).

I've shared them with several of my friends, and I have half the recipe sitting in my fridge to make later today.  They're awesome.  And fun.  And oh what a special treat, right?

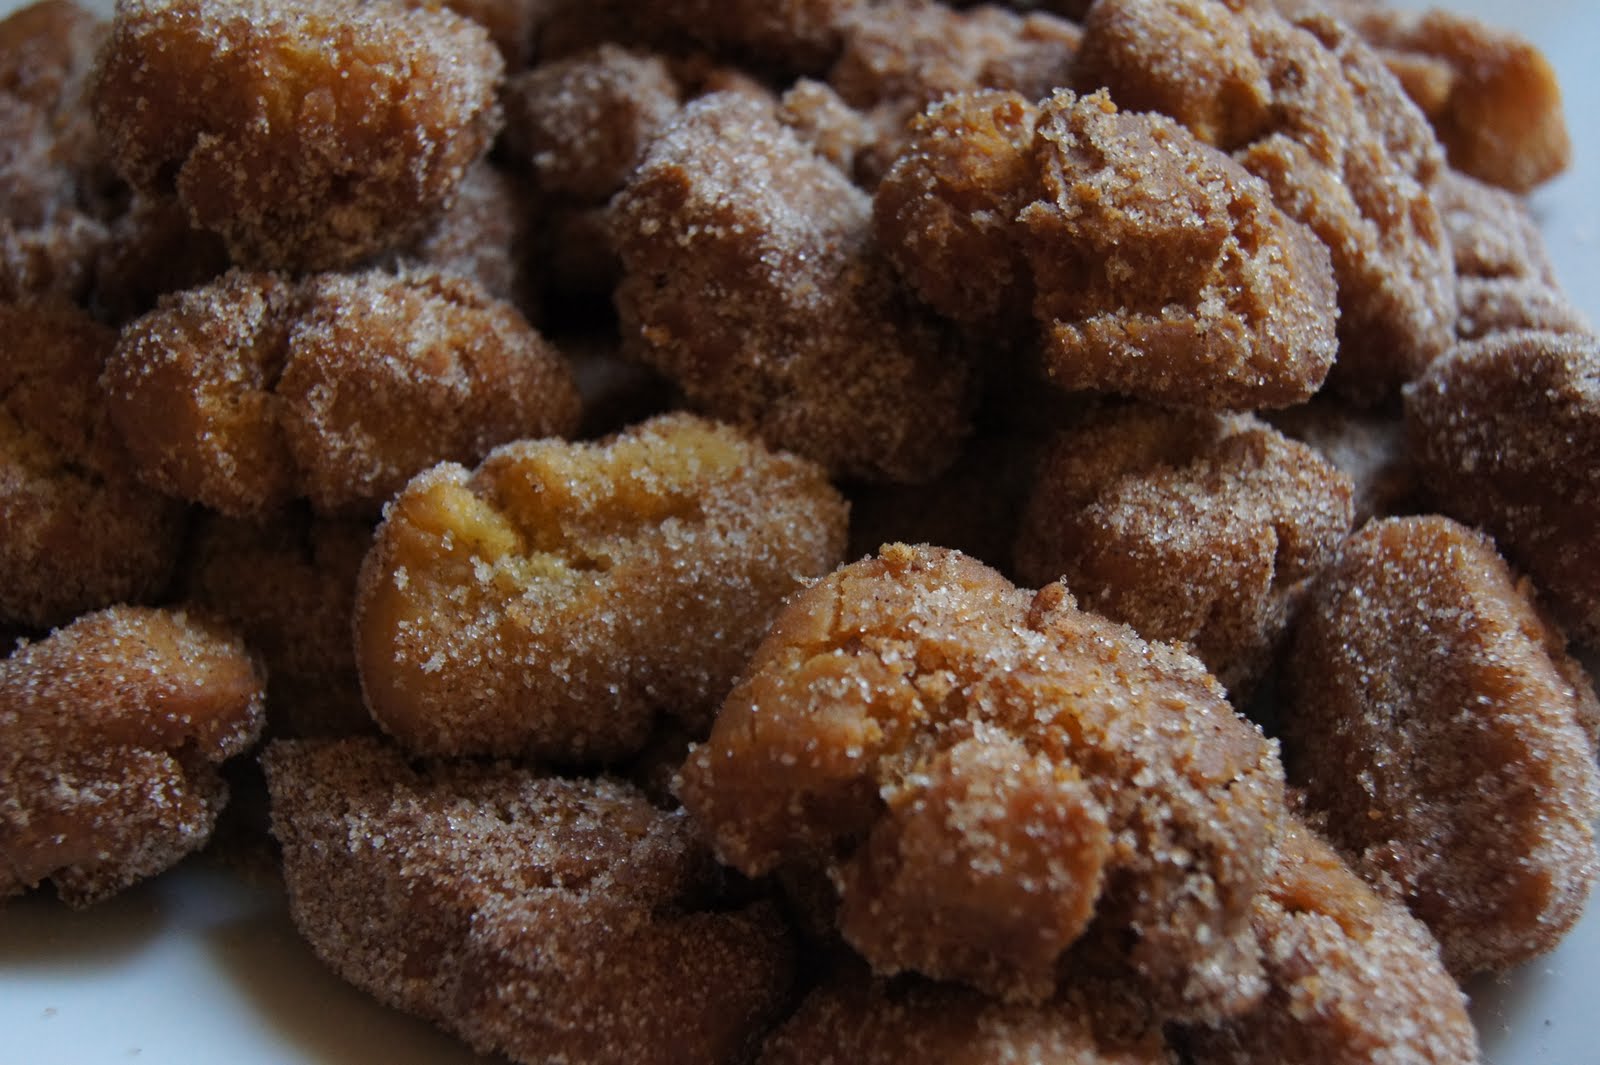
Plate full of apple cider donut holes

Apple Cider Donuts

Ingredients:
2 c apple cider
1 c sugar
1/4 c butter, room temperature (or butter substitute for dairy free)
1/2 c buttermilk (or rice/soy/coconut milk with about 2 T mayonnaise - trust me)
2 eggs
3 1/2 c flour
1 t baking soda
2 t baking powder
3/4 t cinnamon
3/4 t salt
1/2 t nutmeg
Additional sugar and cinnamon for rolling post frying

Directions:
Reduce the apple cider.  This will take about a half hour or more, and you can do it in advance then stick it in the fridge for when you're ready to make donuts.  My husband also decided this was a really good topping for ice cream.  Just sayin'.  Boil the apple cider until it's reduced to about 1/4 cup.  It will be slightly thicker and much darker than when it started, but don't burn it.

Jar of reduced apple cider for apple cider donuts

When you're ready to make the donuts themselves, measure out the butter and place it into a mixing bowl.  Personally, I love using my special liquid/dry measuring cup for items like butter that tend to stick in a regular measuring cup - honey, mayonnaise, etc are much easier in this, too.

Pampered Chef liquid/dry measuring cup with butter inside

Beat the butter with the sugar, just like your normal baking recipe.  Add the eggs, one at a time, and beat well until combined.  Add the reduced cider and buttermilk, and beat again.   Add the cinnamon, baking powder, baking soda, salt, and nutmeg, then mix until fully incorporated.

Dry ingredients added to apple cider donuts

At about this point, you'll want to start heating your oil.  You want a wide pan, deep enough to hold a couple inches of oil.  Heat on medium high to 350 degrees.

While the oil is heating, add the flour and stir until just combined.  Flour your working surface with extra flour, and pull out a clump of dough.  Carefully roll it in the flour until you can work with it and create a snake like you did in kindergarten with clay.  Using a knife or a board scraper, cut off half inch sections of dough.

When you think the oil is hot enough, drop in a test dough ball.  You want it to immediately start bubbling around your dough.  If it doesn't, your oil isn't hot enough.  Pull it out, and try again in a few minutes.

When bubbles form, the oil is hot enough to fry donuts

Place several donuts at a time, but be sure there is plenty of room for them to move and expand.  They will take only a minute or so to fry on each side before you need to flip them over.  A fork or slotted spoon or chopstick works perfectly for this.

While they are frying on the first side, prepare your finishing station.  On a cookie sheet, place a wire rack.  Atop the wire rack, lay paper towels so that the grease can fully drain from the donuts.  Prepare a bowl with 1 c sugar and 2 t cinnamon to roll your donuts in after they've drained for a few minutes.

Paper towels on a wire rack over a cookie sheet to drain donuts after frying

Now you're ready to start the assembly line.  Fry a few, flip.  Add some more while the first ones are frying on their second side.  You'll know they're ready to flip when the bubbles start reaching the top of the donut and the sides are a beautiful golden brown.

Donuts are ready to flip when they are golden brown around the edges

Pull them out with a slotted spoon when they're done, and add some more.  Let the donuts cool and drain for a few minutes before rolling them in the cinnamon sugar and placing them on a separate plate. Keep frying, rolling more donuts, flipping, and draining until the donut dough is all gone.

The donuts are awesome still warm, but they will keep in a tightly sealed container with a paper towel under them once they've cooled for up to three days.  If they last that long.  If you don't want to make all your donuts at once, you can refrigerate your dough for a couple days.  Make sure you bring it to room temperature - or close - before you fry them, though.  If batter is too cold, it will absorb the grease before frying and will be a much heavier and not as yummy donut.

Enjoy this and more with Blessed With Grace and Tempt My Tummy Tuesday.  Rachel from A Southern Fairytale has an awesome Mouthwatering Monday linkup that I participate in, too.

Tuesday, July 31, 2012

Zucchini Bread - Tasty Tuesday!

So a friend of mine gave me a zucchini bigger than my arm.  I'm not joking.  I now understand why people joke about leaving zucchini on neighbors' doorsteps and then running.  Holy cats.  There was nothing to do but make zucchini bread, right?

Ginormous zucchini

So... 15 eggs later, I have 7 loaves of zucchini bread, and 96 mini muffins.  Or I did.  One loaf has been completely demolished.  Two loaves went home with a friend.  And another loaf has been started, plus several of the mini muffins have disappeared mysteriously.  It still is as good and as loved as it was when my mom used to make this for me as a kid.

The good news?  The wee ones love it.  And I don't think I need to make zucchini bread again for awhile.  Oh, and I'll be bringing some of those muffins with me to BlogHer, so hit me up if you see me!

Zucchini Bread

Ingredients:
2 eggs
1 1/2 c sugar
1 c oil
1 t baking powder
1 t baking soda
1 T cinnamon
1/2 t nutmeg
1 t salt
3 1/2 c flour
3 c shredded zucchini

Directions:
Peel your zucchini (or if you're my mom, don't, but I find the skin a little tough).  Cut it in half, and then use a spoon to scrape out the seeds and the spongy middle.  Use a food processor to shred the zucchini, or go old school and use a grater - just watch your knuckles!

Extremely large bowl of grated zucchini

My huge zucchini made this extremely large bowl of shredded zucchini.  You don't need nearly this much.  I like to shred my zucchini first so that some of the liquid in the zucchini can start to drain, as you don't need any extra moisture in the bread.  If you want to get fancy, put it in a colander, but I forgot, and this works just fine.

Preheat your oven to 325 degrees.  Add the eggs to your bowl, and beat until the yolks and whites are mixed thoroughly.  Add the sugar and beat until it is light and fluffy.  While the mixer is still going (but not too high), slowly add the oil.  You want it to incorporate as you're pouring and not have a big glop of oil you have to incorporate later.

Add the cinnamon, baking powder, baking soda, salt, and nutmeg.  Mix thoroughly to combine, then add the flour in two batches, stirring gently between each addition.  Add the zucchini, stirring just until it's incorporated.

Grease two loaf pans, and pour half the batter into each pan.  Bake at 325 degrees for 50-60 minutes, until a tester comes out clean.  Cool for ten minutes in the pans, then turn out onto cooling racks.  Cool thoroughly, then slice.  The bread freezes beautifully (I remember how much I used to love eating the bread straight from the freezer), and it will keep for several days tightly wrapped.  If it lasts that long.

Slices of zucchini bread

Enjoy this and more with Blessed With Grace and Tempt My Tummy Tuesday.

Tuesday, May 8, 2012

Tasty Tuesdy - Fun With Oatmeal

Today, what I'm cooking isn't a fancy dish.  It isn't something that most of you haven't already made before.  Who doesn't love oatmeal as a great comfort dish.  So why am I posting about oatmeal?  I see commercials and advertisements and store displays more and more that advertise "oatmeal" that... really isn't.

What they're selling is instant and is microwaved and full of all sorts of ingredients that don't need to be there.  I've tried these oatmeals when they've been put in my mailbox as part of a newspaper promotion, and the stuff that comes from the pouch is powdery.  It's not oats, and it is nowhere near as good - or cheap - as what I can make at home with no effort and barely any time.

Oatmeal is a staple breakfast for us, and half the fun is deciding what we're going to do with it.  The wee ones sometimes specifically ask for something, but most of the time they like it to be a surprise.  How can you argue with a breakfast that's quick, healthy, and loved by the wee ones?

Go make some tomorrow morning.  Or now for a snack.


Fun with Oatmeal

Ingredients:
1/3 c rolled oats*
2/3 c milk*
Toppings

*Cooking oatmeal is a ratio of 1 part oats to 2 parts liquid. I find that 1/3 cup is plenty of oatmeal for a meal for me or for the wee ones, but feel free to make more or less, depending upon your appetite using that ratio.

Directions:
Place the oats and milk into a saucepan.  If you are using dried fruits as part of your toppings, add those, too.  Otherwise, it's the oats and the milk.  Turn the stove onto medium low, and walk away.


As far as toppings go, I have a variety of go to items.  I love dried cherries in my oatmeal.  Besides that, we'll do everything from coconut to mango to sliced bananas or strawberries, and sometimes we'll be decadent and add a few dark chocolate chips.  The wee ones love their oatmeal finished with a drizzle of good quality maple syrup, while I'll add a little sprinkle of brown sugar if I want something a bit sweeter.


All you need to do with the oatmeal is swirl the pan every few minutes.  You want the oatmeal to come to a very light boil - still mostly a simmer - and cook for five or so minutes like this.  It's the perfect breakfast because you can walk away and do other things.  Go put on your makeup, and come back to breakfast that's ready to go.  Simply pour the oatmeal into a bowl, and add any of your fresh toppings, then enjoy while hot.  It's truly that easy.


Promise me you won't buy any more of those packets?  What will you put in your oatmeal?

Enjoy this and more with Blessed With Grace and Tempt My Tummy Tuesday. Also posting now with A Southern Fairytale and her Mouthwatering Monday.

Tuesday, March 6, 2012

Tasty Tuesday - Pumpkin Waffles

Yes, I've been in a bit of a Blissdom haze lately. That hasn't been my entire focus, happy as the wee ones are to know that. As part of Little Miss's school's reading program, the school earned a pancake breakfast day. The teachers cooked pancakes for every student in the school who had achieved the reading incentive for the past week.

It's awfully sweet. I love all the extras that her principal and teachers do to go above and beyond. Unfortunately, some of the treats - including the pizza for the entire school this Friday - don't work for us. Little Miss has a dairy allergy and can't eat the pancakes. (Or so I hope - a local restaurant has told us multiple times that their pancakes and waffles contain no dairy!) The last two years, I've made special waffles for her instead of the pancakes.

Why waffles? It's really obvious with waffles instead of pancakes - to her and to the teacher - that she's eating what she's supposed to. Plus, I have a waffle maker, and I figure I should use it when I can. Unfortunately I don't like waffles, so this is purely for the wee ones. And my husband, who always sneaks some.

This time? I went with pumpkin. And they were good. Or so I was told....


Pumpkin Waffles

Ingredients:
1 1/2 T baking powder
1 T cinnamon
1 t allspice
1 t nutmeg, grated
1/2 t salt
2 1/2 c flour
1/2 c brown sugar
1 c canned pumpkin
1 t fresh ginger, grated
2 c milk (dairy free for us - I love coconut milk or at least rice milk for it)
4 eggs, separated
1/4 cup butter substitute, melted

Directions:
Preheat your waffle iron. These will take a little longer to bake, so if yours has an adjustable temperature, turn it up higher than you normally would. If it doesn't (mine doesn't), just know you'll need to bake these longer than normal waffles.

In a large bowl, mix together the flour, baking powder, brown sugar, cinnamon, allspice, nutmeg, and salt until they're well-mixed. In a separate bowl (ok, so I use a large liquid measuring cup so I don't have to dirty another bowl - I'm lazy), mix together the pumpkin, milk, ginger, and egg yolks until completely blended (save those whites!). Slowly add the butter (substitute) so that it doesn't cook the eggs or turn into a solid lump. Make sure you're whisking as you add the melted butter. Add the liquid ingredients to the dry ingredients and mix until just combined.

Take the egg whites and put in a clean metal or glass bowl. Whip until medium peaks form. They will look like this:


Fold the egg whites into the waffle batter. That means you'll want to add about a third of the egg whites to the batter and sacrifice their fluffiness. Incorporate them as gently as you can. Don't stir them like you normally would. Instead scrape underneath the batter with the spatula and turn the batter over on itself. This will help keep the egg whites aerated and your waffles fluffy. After you get the first third incorporated, go ahead and add the rest of the eggs, folding as gently as possible and using as few motions as possible. Once you have very few or small white streaks remaining, your batter is done.


Pour batter into your waffle maker. Mine takes almost a cup per waffle, but all waffle makers are different. Let the waffles cook until no more steam come from the sides before removing, using a fork to gently pry the waffles out, if needed. Remember that these will take longer than normal waffles, so don't go by the "done" timer on your waffle iron.

These store well in a sealed container for a few days, or feel free to freeze them. When I want to serve them after the first day, I pop them in the toaster for a bit, and they turn out great. I have a happy family!


Enjoy this and more with Blessed With Grace and Tempt My Tummy Tuesday. Also posting now with A Southern Fairytale and her Mouthwatering Monday.

Tuesday, December 6, 2011

Tasty Tuesday - Pumpkin Chocolate Muffins

There was a bake sale at Mister Man's school last week. Remember those and how fun they were to pick and choose what you wanted from all the great bakers in the community, ooooing and ahhhing over the delectable delights? Most schools no longer allow this or just have store bought items (boo!), but we're lucky that ours still allows a bake sale from homemade goodies. Of course, I had to bake, too.

I couldn't choose something easy or simple that I knew a lot of people would be making. No brownies or chocolate chip cookies or sugar cookies for me. I had to find something that I thought would be unique for the bake sale but still appealing and somewhat seasonal. I finally decided to make pumpkin chocolate muffins, and they were awesome. Even better, they were dairy and nut free, so some students who normally can't purchase treats were able to enjoy them, too.


Pumpkin Chocolate Muffins

Ingredients:
4 eggs
1 1/2 c granulated sugar
1 15oz can pumpkin puree (not pumpkin pie filling)
3 c flour
2 t baking soda
1 1/2 t baking powder
2 t cinnamon
1/2 t nutmeg
1/2 t salt
2 c chocolate chunks (mini chips work, I chopped a bar of dark chocolate)

Directions:
Preheat your oven to 350 degrees (I always bake with my convection oven, which means I preheat to 300 for baking - mine has a great feature that recalculates the temp and time for baked goods using a convection). You can make these regular size muffins (about 2 dozen) or mini muffins (up to 8 dozen). Either grease your tins or line them with muffins papers.

Beat the eggs and sugar in a large bowl until it's lighter in color and has grown in volume. Add the pumpkin puree and oil, and beat again.


Add the baking soda, baking powder, cinnamon, nutmeg, and salt to the bowl and mix well. Add the flour and stir slowly until mostly blended. While there are still some white streaks add the chocolate chunks/chips. I would not use full size chips if you're making mini muffins. And the unique shapes that chopping a bar of chocolate adds was pretty cool in the muffins, something I would definitely do again.


Add the batter to the muffin tins, filling about 2/3 of the way full. Bake in your 350 degree oven for 20 minutes, until a tester comes clean (or they spring back when you touch them - with mini muffins, especially, I go for the touch test when baking). Let the muffins cool a couple minutes, then remove them from their pans. If your muffins are stuck to the pans, check out my cool solution. Because, yes, some of my muffins stuck. I successfully rescused them all, however.


Enjoy this and more with Blessed With Grace and Tempt My Tummy Tuesday. Also posting now with A Southern Fairytale and her Mouthwatering Monday.

Tuesday, November 29, 2011

Tasty Tuesday - Crepes!

Birthdays are big in our house. Well, I make them big anyway. Everyone gets to choose the birthday dinner and the type of cake ... and I'll make it. We've done everything from Peach Cake to homemade bagel dogs to pasta with carbonara and more. Thursday was my birthday. So of course I got breakfast in bed. Well, I at least had breakfast made for me. Ok ok ok, so I had to make my own special birthday breakfast.

That's ok, because it was worth it. I know Melisa thinks I made these for her, but really I made them in honor of her, so there's no reason for her to be upset that our double recipe was gone by the time we finished our meal. Besides, she was in Tennessee and far away; they would have been gross if I'd saved them for her.


Easy Crepes

Ingredients*:
2 eggs
1 c milk (rice milk for us)
1 c flour
1 pinch salt
1 1/2 t butter (or in our case dairy free dairy substitute), melted

Directions:
Place all the ingredients into a blender - the eggs, flour, milk, salt, and melted butter. Turn it on, starting at low and moving it up until it's blended. This will take only a few seconds. You want it completely mixed but don't want to keep mixing it so that you don't have tough gluten filled crepes. This is going to be an extremely thin batter. Don't panic that it's too thin. Trust me.


Once you have the mixture blended, stick it in the fridge for a half hour or so (or do it overnight - covered - if you want to have these when you first wake up. Yes, everything is already cold, but when you let mixtures with flour (pie crust, pizza dough, pasta, etc) rest after mixing, it allows the flour to relax so that it isn't as tough and that you can keep it from snapping back together as you work with it. Just trust me and do it.

I have an actual crepe pan, which is nonstick and very shallow. If you don't have a crepe pan, you can use a frying pan, but try to use the shallowest one that you own. Heat the pan on medium heat, and brush the pan with oil so that your crepes don't stick. With my pan, I have to brush it once (and this is just a tiny tiny bit of oil) and never again for a batch. Depending on your pan, you may need to reoil it as you go.


I always use a measuring cup to do my crepes. I dip a one-third cup measure into the batter then pour it in a circle at the center of the pan. Immediately, you must pick up the pan and twirl it in a circle. Don't do it slowly, or your batter will cook where it is an not spread across the entire pan. That doesn't mean you have to toss the crepe, but your goal is to have it reach the full circle. It takes a little practice, but you'll get it. Once you've twirled it and had the batter cover the entire pan, place it back on the stove and let it cook.


It will take only a minute or so to cook on the first side. You'll know it's ready when you see the edges start to get almost crispy and begin to pull away from the edge a little. I use a wooden fork to flip my crepes, as it's the easiest and most effective tool I've found. Use a tine of the fork to pull the edge of the crepe away from the pan, then slide the fork under it (use your fingers to hold the crepe in place, as needed) and lift. Flip it over, then let it cook on the other side for another thirty to forty-five seconds.


Remove the crepe to a plate and decide what you're going to fill it with. Some suggestions from my family? Nutella, Nutella with sliced bananas, cherry preserves, cherry preserves with Nutella, maple syrup, maple syrup with bananas, bananas with Nutella and whipped cream. Whatever your filling, place it in the center of the crepe in a line from one end to the other. Carefully fold the crepe over the line, then roll it up. Serve immediately.

If you're making these for later, you can separate them with waxed paper to store. They actually store great in the freezer, which had been my original intention when making the double batch. Silly me. And yes, it's possible to make these into savory crepes (mmm Thai chicken or creamed spinach). But I need some Nutella in my birthday breakfast crepes.


*This is a single batch. For my family of four, I made a double batch (about 16 crepes) that was a good meal for us but were all gone with no leftovers. I figure I'll be doing at least a triple batch by the time Mister Man is a teenager.

Win a Big G prize pack with Justice League comics, cereal, and a Green Lantern action figure

Enjoy this and more with Blessed With Grace and Tempt My Tummy Tuesday. Also posting now with A Southern Fairytale and her Mouthwatering Monday.

Tuesday, October 11, 2011

Tasty Tuesday - Pumpkin Donuts

There are some things that just scream fall to me, and pumpkin is one of them. Unfortunately, I don't like pumpkin. Or so I thought. Then I had pumpkin donuts years and years ago and discovered that I like pumpkin, but just in very certain ways. Like in pumpkin donuts.

I love making them, but they make a ton of donuts, so this is a recipe I make to share. I try to do it every fall, but I don't always succeed. This year, I had to bring something for the fall appreciation luncheon. After volunteering to make an apple crisp (easy peasy!) and being shot down because someone was already making one - drat! - I decided to do the pumpkin donuts. This is a make it the morning you're going to eat them recipe, and it takes some time because you have to roll them and fry them in batches, but ohhhhh is it worth it. Not hard. Just a little time.


Pumpkin Donuts
3 1/2 c flour
1 t cinnamon
1/2 t nutmeg
1 c sugar
1 T baking powder
1 egg
2 egg yolks
3 T butter (I used dairy free butter substitute, and it absolutely works!)
1/2 c pumpkin puree*
2/3 c butter milk (yes, I used coconut milk mixed thickened with mayonaise and it was perfect)
oil for frying

Directions:
Mix the dry ingredients - flour, cinnamon, nutmeg, and baking powder but not the sugar - in a large bowl until well distributed.


Start heating your oil for frying. You want the oil to come to 365-375 degrees. Use a fryer or a wide cast iron skillet with about two inches of oil for frying. If you're me, you won't measure the tempterature because you don't have a thermometer that does that and instead can use a dough ball to test it. Drop it in, and if it has small bubbles frothing around it, it's ready. If not, wait until it's hotter. Yes, I am that scientific when baking. Just wait to the end of this to see what my asterisk was for.

Cream the butter and sugar, then add the egg and egg yolks one at a time and beat until well blended. Add the pumpkin puree and the butter milk and mix until blended, then pour the wet ingredients into the dry ingredients and stir until combined.


Thoroughly flour a surface for rolling the dough. Grab a hunk - no larger than your hand - and use some of the flour to dust the top, too. Roll it into a snake about one-half inch thick, then cut it into pieces about a half inch long to make the individual donuts that are vaguely pillow shaped. Pick up the cut donuts and jiggle them in your hand to remove as much of the flour as possible and soften the edges.


Place the tester donut into the oil to ensure the oil is hot enough. Assuming it is, place no more than eight or ten donuts into the pot at a time. This will both keep the temperature of the oil from dipping too low and from crowding the pot and having the donuts stick together. Let them cook a minute or two on one side, then poke the side of them with a chopstick or the side of a spider to flip them. The other side will generally cook quicker, maybe 45 seconds to a minute.


Remove the fully cooked donuts to a paper towel lined plate to cool slightly before rolling in cinnamon sugar (1 c sugar to 4 t cinnamon). I will cut a batch or two, then start frying. While they're frying on the first side, I'll cut some more donuts. After I've flipped the donuts, I'll quickly roll the cooling donuts in the cinnamon sugar and put them on my final plate so that I always have a piece of the process moving forward. It works pretty well in terms of timing and helps speed the process, too.


This makes a lot of donuts, so be prepared to share. Or keep them all for yourself, as I'm tempted to. Don't say I didn't warn you!

*Or you can be like me and be rushing and not paying attention and put the entire can of pumpkin puree into the donuts. Note that I said pumpkin puree and not pumpkin pie filling. Those are two very different things, and you want the pure pumpkin. If you make this mistake, it's fixable. Add another cup of flour and teaspoon of cinnamon to the dry ingredients, along with a quarter cup sugar and a little nutmeg and baking powder (1/2 t). It will then make more donuts, but really... at this point, that's not a bad thing. And yes, it's possible that I've made this mistake more than once, but no one knows by the time they're done!

Enjoy this and more with Blessed With Grace and Tempt My Tummy Tuesday. Also posting now with A Southern Fairytale and her Mouthwatering Monday.

last chance Win a Purse Perfector purse organizer - trust me, you won't know what you did without it
Win a Big G prize pack - cereal and a $25 gift card
Think Pink this October and share your story of how breast cancer touched you; learn more and enter a Think Pink giveaway

Sunday, May 8, 2011

Cheerios Anyone?

I do my best to ensure that the wee ones eat healthfully. We don't eat out as often as many people I know. I (fortunately) like to cook from scratch, so the majority of our foods are not processed. I'm lucky that the wee ones like a variety of foods - including fruits and vegetables - and that they eat them at most meals.

Breakfast is a big meal in my house. I'm pretty insistent that they eat healthfully for breakfast. They rarely get sugar at breakfast in an effort to keep them as focused as possible throughout the day. I ensure there is always protein at that meal, too.

But some days, I go the easy route. I don't have the time (or don't make the time) or the energy to have a completely homemade breakfast. That doesn't mean I don't insist on something I feel comfortable feeding them. I have a few go to choices in the house - that the wee one are always offered even when I'm also offering up the choice of omelets and oatmeal or other more labor and time intensive options.

This morning was one of the days where the wee ones weren't getting the ideal breakfast. It was Mother's Day. And I'm getting a nasty cold and so am just wiped out. And my husband has been gone coaching all weekend, so he's not around to parent.

Little Miss woke me up this morning at 7:14 by singing "Happy Mother's Day to Mom" although I remained only half conscious for awhile after that. I just couldn't convince my body to get out of bed. As clock continued to march forward, I knew the wee ones were going to be getting hungry.

From downstairs, I could hear them playing Uno together... until they decided they were too hungry to continue. I groaned internally as I waited to hear the tromping up the stairs to beg my help. Instead, I heard almost silence. The refrigerator door opened and closed, and I could hear them whispering to each other.

Finally, I managed to drag myself downstairs to see what mischief they'd gotten themselves into.


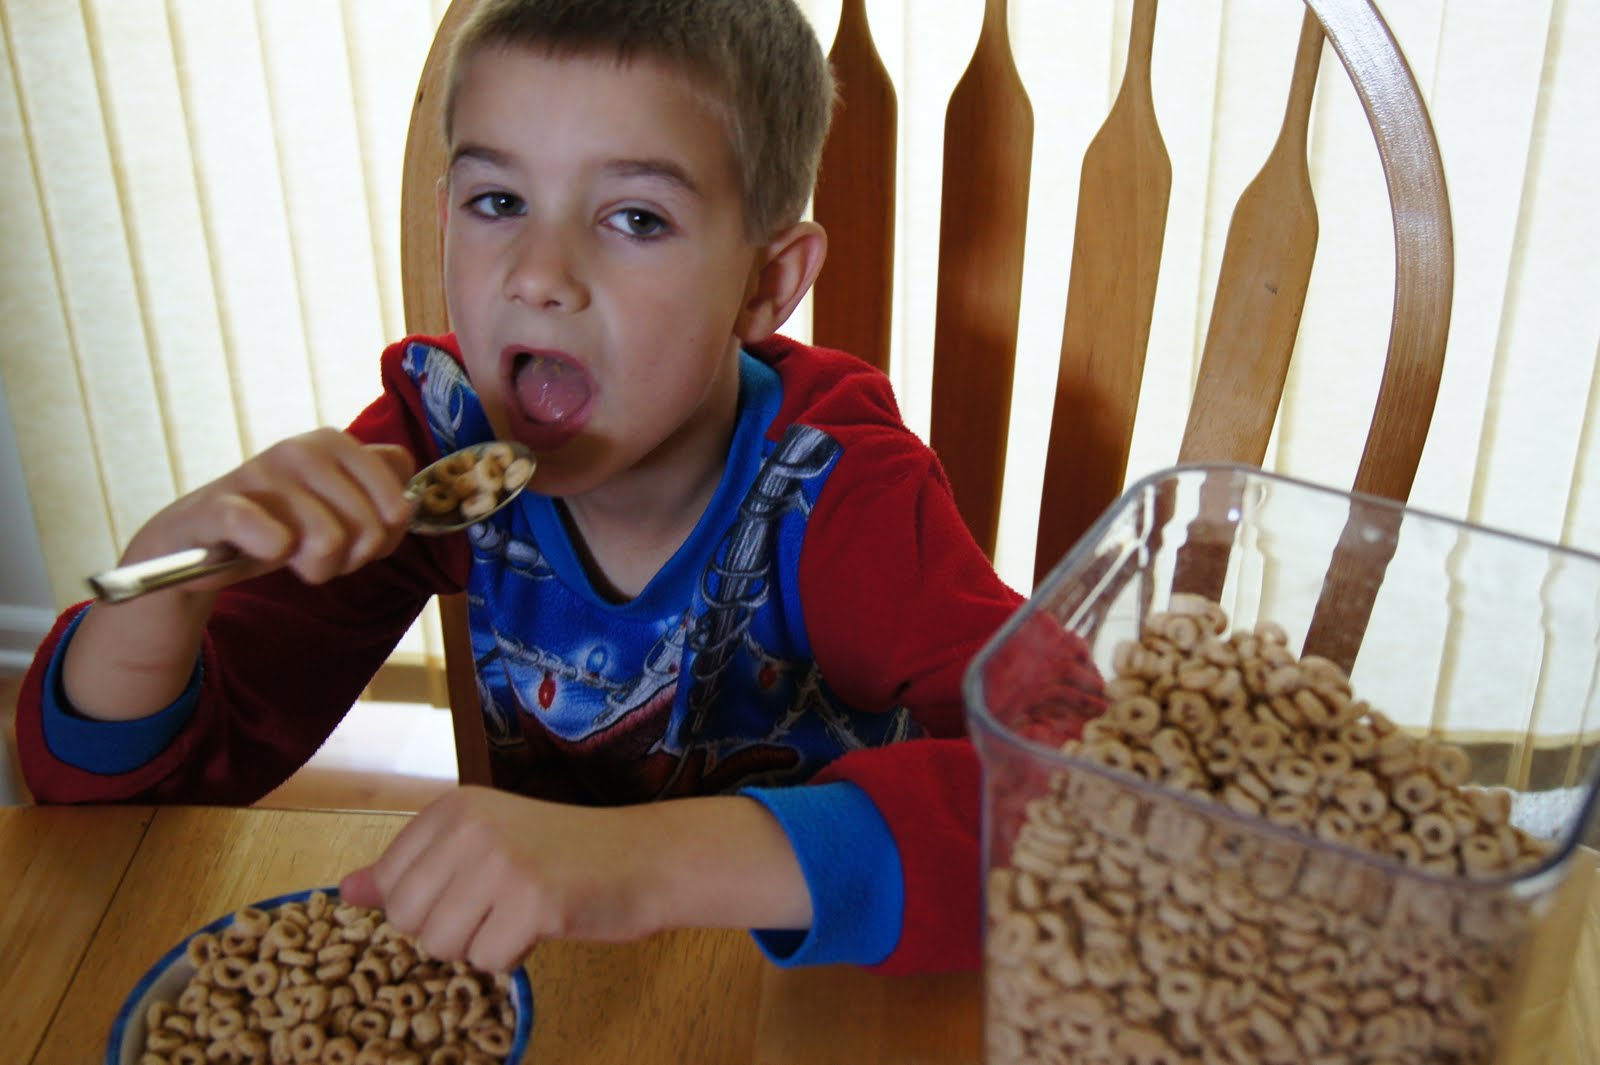
Oh my wee ones have grown up! (And check it out - Little Miss got her protein in with the sushi left over from dinner the night before. Apparently that was the fridge opening and closing.)

Somehow, though, no matter how much they grow up, I don't see them ever outgrowing their love of a simple bowl of Cheerios. I may no longer be placing them on a high chair tray one by one or spooning the cereal into their mouths, but this is one house where there will always be a box of original Cheerios open and waiting. And two wee one who have learned that this is a breakfast they can make all by themselves!

In the interest of full disclosure, this post was written as part of the Cheerios Blogger Circle. I was not compensated in any way, and all opinions are my own.

Win a Young Author prize pack here!

Tuesday, January 11, 2011

Tasty Tuesday - Banana Bread

So last week, I had a desire to bake. And I had bananas in the freezer that were taking up too much room. Voila, banana bread, right? Wellllll, almost. Because it's easier to use my adapted recipes by looking them up on my blog, I searched for the recipe here. And I searched. And then I searched some more.

Apparently I always thought that since I make banana bread all the time, I already had the recipe up here. Ahhhhh, not so much. The good news for me is that I got the banana bread made for my PTO meeting. The good news for you? I'm finally posting the recipe. (That is good news, right?)

Banana Bread

Makes 2 loaves (because, really, who wants just one?)

Ingredients:
2 1/2 c flour (I usually do about half whole wheat flour)
1 t salt
1 t baking soda
1/2 t baking powder
10 T butter, unsalted
1 1/4 c brown sugar
2 eggs, beaten
4-5 bananas

Directions:
Preheat the oven to 350 degrees.

Add the butter and sugar into a bowl, and beat on high speed until lightened in color and texture, two to three minutes. Add the salt, baking powder, and baking soda, and mix until thoroughly blended. Add the flour, and stir until the flour is incorporated and you have a sandy texture.

Gradually add the already beaten eggs to the mixture. I slowly pour them in while the mixer is going. Add bananas one at a time, and keep mixing. I don't mash them ahead of time, as I like the sometimes surprise of a small bite of pure banana in my bread, but when you use truly ripe bananas, you don't need to mash them prior to adding them.

Grease two loaf pans. Pour half the batter into each loaf pan. Gently sprinkle granulated sugar atop each unbaked loaf. I usually use about 1/8 cup total, although I of course don't measure it because why waste the time!

Bake for about an hour, until a toothpick comes out clean. Let the loaves cool for five to ten minutes before you turn them out. Yum!


(So who loves the awesomely cool new white square plates I got for my birthday and Christmas from my mom? No more funky green ones for me! Yep, they've already been donated.)

Enjoy this and more at The Well with week with Blessed With Grace!

Giveaways:
Family 4 pack of tickets to Toy Story 3 on ice in Chicago here
Win one of two copies of Avatar in Blu-Ray here
Monster Truck Jam family 4 pack of tickets in Chicago here


  © Blogger template 'Solitude' by Ourblogtemplates.com 2008

Back to TOP