Showing posts with label vegetarian. Show all posts

Tuesday, October 23, 2012

S'mores Bars - Tasty Tuesday!

This past week was teacher conferences.  Our PTO provides dinner for the staff both nights of conferences, knowing that they're constantly running.  They absolutely appreciate it, and they adore that we make everything homemade for them rather than catering it.  I signed up to bring a dessert and wanted to bring something creative.  There are always a ton of brownies and cakes.  So I decided to make s'mores bars.

I had no idea how I was going to do it, but I had marshmallows, chocolate, and tons of graham crackers in my house, so there had to be a way, right?  I finally decided to do a takeoff of a shortbread bar recipe, and my luck held - it worked.

I brought a sample to a friend before conferences, and she ate the whole thing in one sitting.  After conferences, there were no leftovers even though desserts are usually overboard.  I made them again to bring to the Chicago Food Swap this past weekend.  My husband requested that I just trade with myself.  And they went over nicely at the food swap, too.  Even Mister Man liked them.  This was his reaction to them after he'd finished his sample.

Licking the plate clean after s'mores bars

S'mores Bars

Ingredients:
3/4 c butter at room temperature
2/3 c sugar
1 egg at room temperature
1 t vanilla
1 t baking powder
1/2 t salt
20 graham crackers
1/2 c flour
1 1/2 c chocolate chips
20-25 large marshmallows

Directions:
Crush your graham crackers.  I love pulsing them in my blender, because it's easy and not messy.  I've found that the best way is to break the graham crackers in their quarters and do half, pulsing until they're just about crushed, then adding the other half and proceeding the same way.  Otherwise, that large bag and a rolling pin or can works well, too - and helps get rid of frustration.

Use the food processor to crush graham crackers for s'mores bars

Beat together the butter and sugar until light and fluffy.  It doesn't get light and fluffy if the butter is cold, so make sure it's at room temperature.  Add the egg and vanilla and beat again. until well combined.  Add the baking powder and mix once again.

Add the graham crackers and flour and stir until just combined.  Grease a 9x13 pan and put the graham cracker mixture into the pan, reserving around a cup or a little more for a topping.  This is a press with your fingers exercise.  I tried to be dainty and use my spatula, but it didn't work.

Pat the crust into place for your s'mores bars

Pour the chocolate chips over the crust into a nice, even layer.  You can use chocolate bars (it takes about 7), but the chips taste better and are cheaper.  The marshmallows are the next layer.  Take the marshmallow in your fingertips and use your other fingertips to twist and pull it apart so you have two non-smushed marshmallow halves.  Place the halves sticky side down in rows over the chocolate.  I did five halves per row, but do what works for you.  Crumble the last of the graham cracker mixture over top that, and voila!

The s'mores bars are ready to bake now

Bake in a 350 degree oven for 25-30 minutes.  Let them cool fully before cutting.  By using the large marshmallows instead of mini-marshmallows, you've given yourself room to cut without your knife getting stuck in marshmallow and the topping pulling off.  See?  I'm thinking!

S'mores bars are done when the marshmallows are puffy and golden


Once they're ready, you can serve them at room temperature and store them in a sealed container for three or so days.  If they last that long....

S'mores bar ready to eat

Mister Man voluntarily got a fork for his s'mores bars
Mister Man decided he needed a fork to eat these.  Smart kid.

Enjoy this and more with Blessed With Grace and Tempt My Tummy Tuesday.  Rachel from A Southern Fairytale has an awesome Mouthwatering Monday linkup that I participate in, too.

Tuesday, October 16, 2012

Cherry Cake with Fudge Filling and Triple Berry Frosting - Tasty Tuesday!

So Mister Man is officially 9.  While we haven't had his birthday party yet - and to be honest, I haven't planned it so shhh - we did celebrate as a family the day he turned 9 on 10/11/12 (seriously, how cool is that?).  And celebrations mean one thing: he gets to choose his dinner and the kind of cake I make for him.

Once again, he chose French toast, so once again I didn't actually eat the birthday dinner I made.  I know... I make an awesome French toast, but I don't like it.  Go fig.  I just discovered that I haven't put up my recipe for this, so apparently that happens the next time I make it.  Because you want that recipe.

Mister Man also asked for a cherry cake with triple berry frosting.  It was good.  Really good.

Delicious cherry cake slice

Cherry Cake

Ingredients:
2 sticks butter, room temperature
1 3/4 c sugar, separated
4 eggs, separated
2 3/4 c flour
2 1/2 t baking powder
3/4 t salt
1 c milk
1 t vanilla bean paste (or vanilla extract, same quantity)
1/2 t almond extract
1 cup dried cherries, chopped
1/4 t cream of tartar

Directions:
Beat the butter until it's creamy.  Slowly pour in 1 1/2 cups sugar while it's mixing (save the extra 1/4 cup for later), and beat on high until it's lightened in color and nice and fluffy, somewhere around three to five minutes of beating.  Separate your eggs while the butter and sugar are mixing.  Slowly add the egg yolks, one at a time, mixing well between each addition.

Eggs and sugar should look like this

Add the baking powder and salt, and mix well.  Add 1 cup of flour and stir until mostly combined.  Add the vanilla, almond extract, and 1/2 of the milk and stir until combined.   Add 1 more cup flour, stir.  Add the rest of the milk and stir.  Add the last of the flour and stir one last time.  Next, add the cherries, and carefully stir until just combined.

Why stir so little?  You don't want the flour to form gluten strands, which happens when you overmix it.  That's why you get bubbles in your muffins and cakes, which is not the look we're going for.  It also makes them tough, and we want a nice, light cake.

Note that the batter hasn't been completely stirred. Stir as little as possible to avoid air bubbles in your cake due to overmixing

Next up is the egg whites you've been saving.  When they start, they'll look like this:

Egg whites ready to beat

Add the cream of tartar, and start beating the egg whites.  Once they've gotten nice and frothy, go ahead and slowly add the last 1/4 cup sugar you were reserving while still beating the eggs.  Continue to beat them until they form soft peaks.  If you overbeat, they'll dry out and get nasty - again, not what we're going for.

Egg whites with a soft peak

Add about 1/4 of the beaten egg whites to your cake batter, and stir gently to combine.  You need to sacrifice some of the lovely fluff so the batter loosens enough to accept the rest of the egg whites.  This helps make the cake stay light and fluffy.  Once you have the first bit incorporated, pour the rest of the egg whites into the batter and gently fold the egg whites into the batter.  Scrape with a spatula under all the batter and twist to lift.

Grease 2 9x2 pans well (or 3 8x2).  Pour the batter evenly into the pans, and preheat your oven to 350 degrees.

Cherry cake still all nice and fluffy in the pan

Bake for 25 to 35 minutes, until the cake tester comes out clean.  Let the cakes cool in the pans on a rack for 10 to 15 minutes before inverting them to remove from the pans and cool the rest of the way.  Once they're fully cooled, frost as desired.

Half the cake gone

So.  We did a fudge filling (because my dad wanted chocolate in there) and a triple berry frosting.  While this looks like I used some sort of dye, I didn't.  And the crumbs?  Because of the cherry bits in the cake, the knife sticks some while cutting and pulls them loose.  This is actually a cake that doesn't have a lot of crumbs because it is so moist and yummy.

I don't measure anything when making frostings or fillings, so play with them.  They're very forgiving.

So the fudge filling: I used about 3 T butter, 1/2 c cocoa powder, 3 T milk and 2 c powdered sugar.  Oh, and a teaspoon or so of vanilla.  Maybe.  Basically, melt the butter in a heavy saucepan over medium heat.  Add the milk and cocoa powder and stir.  Start adding powdered sugar.  Add a little more milk if it's too thick.  Add powdered sugar until it's as thick as hot fudge sauce (not chocolate syrup).  Keep stirring over the heat until the fudge starts falling off the spoon cleanly.  Stir until it's cooled down to almost room temperature and has thickened nicely.  The constant stirring helps incorporate air and keeps it soft and yummy.  Spread it on the cake.

And the triple berry frosting?  I used maybe half a cup of frozen berries, 2 T butter, and powdered sugar, maybe 3-4 cups.  Again, heat the berries and butter in a heavy saucepan until they're melted, then start adding the powdered sugar.  After awhile, I used my immersion blender to puree the berries in the frosting, then added more powdered sugar and cooked for another five minutes or so.  I stirred while letting it cool some, then spread it over the cake.

Yum.

Enjoy this and more with Blessed With Grace and Tempt My Tummy Tuesday.  Rachel from A Southern Fairytale has an awesome Mouthwatering Monday linkup that I participate in, too.

Tuesday, September 25, 2012

Tomato Tart - Tasty Tuesday!

I am not a pie lover.  Shh, don't tell anyone.  Most pies are ok, but it's rare that I'll voluntarily choose to eat pie.  That said, I love making and eating my apple pie (which is really a crisp).  And peach pie is one of my favorites, but I'd rather go savory.  I'm much more of a quiche girl, which really is just pie as a meal instead of pie as a dessert.  So does it surprise you to learn that I made a tomato tart last week and ate almost all of it by myself over the course of three days?

I didn't think so.  But hey, tomato tart.  That's healthy.  Ish.  Kind of.  Ok, more so than French silk pie, right?  Help me justify.  I need to, because it was that good.  And I'll probably do the same again.

Slice of tomato pie from Honest & Truly recipe

Is it the prettiest pie you've ever seen?  No, but if you'll recall, this was the pie dough I made last week when I had my migraine.  And that food processor pie dough is pretty darn tasty.  Even if it wasn't so pretty this time around.

Tomato Tart

Ingredients:
1 pie crust, my recipe, your recipe, or another method
6 large ripe tomatoes with lots of flavor, preferably something heirloom
3 cloves garlic
2 T extra virgin olive oil
salt and pepper, to taste
1 1/2 c bread crumbs (again, I've used Panko for 15 years, and it's still my favorite - and no one's paying me to say that... yet!)
1 T herbes de Provence
1 1/4 c Parmesan cheese, shredded (shred your own, it melts better and tastes better) - and I just might have not even measured this and just put on enough until I liked it.

Directions:
Start by preparing your tomatoes.  You can go ahead and put  your crust into the pie pan or tart pan, but then stick it back in the fridge so it stays nice and cold.  You want to peel, seed, and dice your tomatoes.  It's not nearly as hard as it sounds.

To peel your  tomatoes, you need to quickly blanch them.  Get a pot of water simmering on the stove.  Then cut a shallow X on the bottom of each tomato.

A shallow X in the bottom of my tomato

Have an ice bath ready for the tomatoes for when they are done blanching.  Easiest way?  Get a decent size bowl, fill it with a bunch of ice from your freezer.  Add water, swishing the bowl as you do so to ensure that the ice doesn't freeze into a giant block and instead stays separate cubes.

Ice bath ready to help peel those tomatoes

Now your're ready to blanch the tomatoes.  Using a slotted spoon, carefully place a couple tomatoes into the water.  Let them sit for less than a minute before you fish them out.  Immediately place them in the ice bath.  I get into a rhythm with this where I will have two tomatoes in the ice bath, two tomatoes in the water, and two tomatoes being peeled and the timing of it works for me.  Figure out what works for you.

Once the tomatoes have cooled for a couple minutes, pull one from the ice bath.  You'll notice that the skin around where you had made your shallow X is peeling back by itself.

Once you've blanched the tomato, the peel starts to come off by itself

Simply take the skin, and pull it back. You'll be amazed by how easy it is to peel.  This also works for other fruits like peaches and the like, when you need to peel those.

Now the tomatoes are ready to seed and dice.  You want as much liquid out of the tomatoes as possible.  To do this, the first step is seeding.  Cut the tomato into pieces.  For a medium size tomato, six is usually enough.  For a larger tomato, I may need 8 or even 10 to ensure that each seed membrane is accessible to me.  Pick up a slice, run your thumb on the edge of the seeds, and they all pop out.  Do this for each tomato.

Tomatoes are now ready to be diced, with no seeds remaining

Go ahead and dice them.  You want them about a quarter inch square, but exactness isn't important.  Once they're diced, I like to wait a little to get the more water out.  I'll put them in a colander and let the juices seep out for another twenty minutes or so.  Although the breadcrumbs help keep the tart from being soggy, the more juice you remove up front, the better.  While you're waiting is a good time to go ahead and mince your garlic cloves.

Now you're ready to put it all together.  Preheat your oven to 400 degrees.  Mix the breadcrumbs with the herbes de Provence and 1/4 cup of your Parmesan cheese.  Place this in the bottom of your pie crust, evenly covering the surface.

Step 1 of assembling Tomato Tart

Now that your tomatoes have released their juices, go ahead and place them into a small bowl.  Add the olive oil, garlic, salt, and pepper to your tomatoes.  Stir it up and taste to make sure the salt and pepper is at a good level for you, remembering that you're still going to be adding a ton of Parmesan, so the salt can be a little light.

Place the tomatoes gently onto the bread crumbs, ensuring it is in an even layer.  Place the rest of your shredded Parmesan atop the tomatoes.  Place the tart into your 400 degree oven, and bake it until slightly browned, around 45 minutes or so.

Tomato pie, ready to eat

This is great while still hot, or you can serve it room temperature.  Trust me, it's awesome either way.  This works wonderfully as an appetizer, or you can be like me and eat it for your meals.  Yes, it makes an awesome breakfast.  Just sayin'.

Enjoy this and more with Blessed With Grace and Tempt My Tummy Tuesday.  Rachel from A Southern Fairytale has an awesome Mouthwatering Monday linkup that I participate in, too.

Tuesday, September 18, 2012

Food Processor Pie Crust - Tasty Tuesday!

I had grand plans for this week's Tasty Tuesday.  I was going to make one of my favorite late summer dishes that I hadn't made in forever that most people haven't had before.  Have you ever enjoyed Tomato Pie?

I didn't think so.

Unfortunately, I've been down with a migraine since Sunday, so I haven't been able to make all of this.  I made the pie crust last night, but today the thought of food is just not appleaing.  So next week will be the conclusion of Tomato Pie.  This week, I bring you the incredibly easy Food Processor Pie Crust - with my secret ingredient to a flaky crust.

Food Processor Pie Crust

Ingredients:
2 c flour
1 T sugar, optional (if I am making a sweet pie, I'll add the full 1T; if a savory pie, I'll add just a little)
pinch salt
3/4 c butter, chilled
1/4 c shortening, chilled
1/4 c ice water - less 2 T
2 T vodka (that would be the secret ingredient)

Directions:
This makes two pie crusts.  For prep, you need to chill your butter, shortening, vodka, and water.  I measure my water into a measuring cup, remove just a little and add ice cubes to keep it cold.  You also need to cut off two longish sheets of plastic wrap to wrap the dough in at the end.

Place the flour, sugar, and salt into the bowl of your food processor.  Make sure your butter and your shortening are well chilled.  If your fats aren't cold, they won't have pockets in the dough, and it won't be as flaky.  Trust me on this one.  Cut your butter and shortening into pieces, and toss them into the bowl, too.

Cold butter and shortening cut into pie crust

Pulse five or six times, until the mixture has pea sized clumps, some smaller some larger.  It's important not to overmix this, as you want the dough to have those clumps of fat I mentioned earlier that will make steam pockets when it's baked and create the nice, flaky layers.

Pie crust ready for liquid to be added

Now is when you want to add the liquid.  The vodka goes in first, and ideally you have this chilled, too.  Why vodka?  Well, mixing water and flour makes gluten which makes for a touch pie crust.  Using alcohol - and a fairly flavorless one with vodka - reduces the water and creates lessgluten nd ergo a more tender crust.  Ta da!

While you are pulsing, add the vodka.  Next will go the water.  I'll be honest that I measure my water, less a little from what I need and put ice cubes in the measuring cup with it tokeep the water extra cold.  Depending on the humidity, you may or may not need all your water, so watch carefully as  you are adding water.  As soon as you see the dough come together, stop.  Don't add any more water, and don't mix it any more.

You can test if there is enough liquid by picking up a small handful of dough and squeezing it.  If it stays together, you're good to go.  If it falls apart, you need more water.  You want to err on the side of slightly more than slightly less water, as you can't add water when rolling it out, but you can add flour.  This was my biggest mistake when I first started making pie crusts - I was too afraid I would add too much water and so never put in enough.


At this point, carefully remove the dough from the food processor, and place half onto one sheet of plastic wrap and the other half on the other sheet.  Using the plastic wrap to cover it, carefully press the dough into two disks.  Make sure they're sealed in the plastic wrap, and place them in the fridge for 8 to 24 hours.  Once they have fully rested, you can roll them out for pie.  If I am making a double crust pie, I will make one of my disks slightly larger than the other.  If not, I keep them the same size.

Can you see the fat pieces in the dough?  That's good pie dough right there!


Enjoy this and more with Blessed With Grace and Tempt My Tummy Tuesday.  Rachel from A Southern Fairytale has an awesome Mouthwatering Monday linkup that I participate in, too.

Tuesday, August 21, 2012

Chocolate Pots de Creme - Tasty Tuesday!

Today is the first day back to school for the wee ones.  So the first thing I did after the bus picked them up (21 minutes late)?  I made chocolate pots de creme.  No, this isn't because I'm going to spoil myself - although the egg white omelet with smoked salmon and goat cheese that I'm going to make myself for lunch shortly might make you think otherwise - but because a friend has a birthday tomorrow.

And she's never had pots de creme before.

Well, ok, really this came about because when I was at her house on Sunday, she loaded me down with organic milk and cream from her neighbor that was about to go bad, and she wasn't going to use it.  Her only request was that if I made whipped cream or something yummy with it, that I allow her a taste.  Since her birthday is tomorrow, I promised to make her something yummy.  After throwing out a few suggestions, I mentioned the pots de creme, and she got a blank look on her face.

After explaining that it's a delicious yummy French custard, she was sold.  She didn't even let me finish my explanation.  So tomorrow, she's coming over, and we're going to eat our pots de creme.  That's why I put them in my extra large ramekins (what, you don't have three sizes of ramekins at home?) and only made a half recipe, which gave me four pots de creme.  So I can pretend like I'm spoiling my husband by surprising him with some tonight, too.   I'll just have to wait until the wee ones are in bed, as I know Mister Man - and he'd want his own, but I'm not sharing!

Easy custard cooked in ramekins

Chocolate Pots de Creme

Ingredients:
4 c heavy cream
7 egg yolks
1/2 c sugar
1 T vanilla bean paste (my new favorite thing ever, but use a 1:1 replacement of vanilla extract if you don't have any... yet)
1 t espresso or java extract
1/2 lb bittersweet chocolate

Directions:
Preheat the oven to 350 degrees.  Place the cream into a heavy pot and scald it - heat it over medium until it starts to steam and a light skin forms atop.  You don't want to burn it, so watch this.  While you're doing that, chop your chocolate and add it to another heavy pot and heat it on low until it melts.

Cream is not boiling, just little bubbles and steam

At the same time, whisk the egg yolks in another bowl.  Add the sugar, espresso, and vanilla and whisk until light and fluffy.  Note that it will be brown and not your usually light yellow.

When the chocolate is melted and cream scalded, pour the cream slowly into the chocolate.  Add a little cream and stir until it's incorporated and continue to add the cream until it's all in the chocolate.  This is one time where you don't want to scrape the bottom of the pan.  If there is any burned cream, that's where it will be.  Yuck.

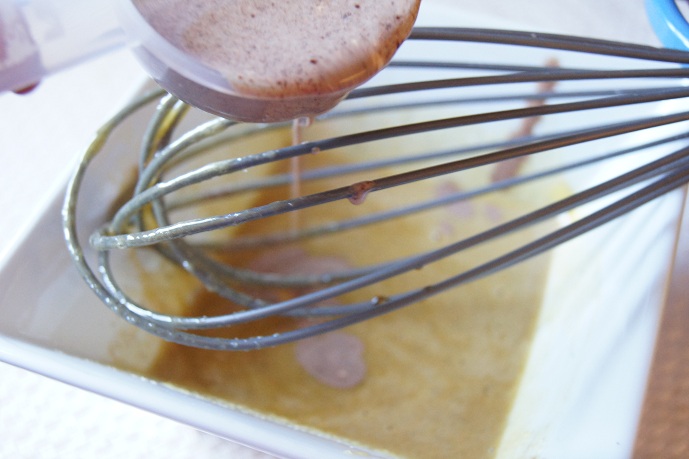
Now you'll do the same to the eggs to temper them.  Using a measuring cup, add a little of the chocolate cream mixture to the eggs while whisking to ensure the eggs don't scramble.  Add a half cup or so in total, which will bring the eggs up to temperature.  At this point, you flip.  While whisking, pour the eggs into the chocolate cream and keep whisking until they're fully incorporated.

Pour hot liquid slowly into eggs while whisking

Place your ramekins into a baking dish.  Using that same measuring cup (yay, no extra mess), scoop out the pots de creme mixture evenly into the ramekins.

Use a measuring cup to get liquids into the ramekins

Place the baking dish into the oven, and using a liquid measuring cup, pour water around the ramekins - careful not to get any in - until the water is about two-thirds of the way up the sides of the ramekins.

The pots de creme need a water bath about two-thirds up the ramekins

Bake the pots de creme at 350 degrees for 25-35 minutes (or a little longer if you make them extra big like I did).  When they are set on top but still jiggly in the middle, they are done.  Let them cool, then place in the fridge until you're ready to enjoy them.  All I'm missing is a little vanilla bean whipped cream and some chocolate shavings.

Enjoy this and more with Blessed With Grace and Tempt My Tummy Tuesday.

Tuesday, August 14, 2012

Creme Brulee - Tasty Tuesday!

Yes, I know.  It's summer.  And it's still hot and yucky most places in the country.  My general rule is that my oven doesn't go on, but I make exceptions sometimes.  There are days when it's cool in the morning, and I know I want a special creamy and cool dessert.  And so I present you with creme brulee.

Is there anything better than that crunch of the sugar shell and then the luscious interior that leaves you licking your spoon and wanting more?  This is such a great summer dessert.  There's even the fun of playing with fire when making it - all the better!

And yeah, it is sorta easy.  Way easier than you would expect given what you pay for it in restaurants.  Four ingredients.  That's it.  Really.

Creme brulee for dessert tonight

Creme Brulee

Ingredients:
4 c heavy cream, not ultrapasteurized
8 egg yolks
1/2 c sugar
2 vanilla beans*

*Vanilla beans are awesome.  I love them.  Use them.  But if you can't, go ahead and use 2 teaspoons of vanilla bean paste, my new favorite ingredient

Directions:
Cut the vanilla beans in half, and use the back of a knife to carefully scrape out the seeds.  If you are not using the seeds, skip the vanilla for now.  Add the cream and the seeds to a heavy pot and turn the heat to medium.  Add the beans, too - why not; it just adds more flavor.  Scald the cream, which means you want it to start to steam and have a few tiny bubbles but do not let it actually boil.  When it just barely starts to have a skin form, it's done.  Remove the vanilla beans and scrape them one last time to get any more seeds out, adding those to the cream, too.

The tiny bubbles at the edge let us know the cream is ready for creme brulee

While the cream scalds, prepare your eggs.  Separate the whites from the yolks (save the whites for meringues or angel food cake or a whole bunch of egg white omelettes).  Place the yolks into a large bowl and whisk them until they're incorporated.  Add the sugar to the yolks and whisk until the yolks are lightened in color.

When the cream is scalded, add just a couple tablespoons of cream to the eggs while whisking the eggs to temper them.  Add a little more cream and keep whisking.  Once the eggs are brought up to temperature, add the remaining cream, still whisking so that you don't cook the eggs.  Scrambled eggs in cream? Eww.  If you didn't use vanilla beans, now is the time to add your vanilla bean paste.

Whisk the creme brulee mixture to keep it from cooking the eggs

Place six ramekins into a baking dish.  Ladle the creme brulee mixture into the ramekins.  To minimize how much I need to carry the liquid, I do my ladling with the baking dish sitting on my stove over my oven.  Smart me, right?  Once they're evenly distributed, place the baking dish in your oven.  Then, use a tea kettle to carefully add boiling water to the baking dish so that it covers at least two-thirds of the ramekins, being sure not to spill any of the water into the ramekins (see, me being smart again).

Using a liquid cup measure makes for easy pouring and distribution of creme brulee

Bake the creme brulee for 25-35 minutes, until the centers are just set.  It will take longer if you let the cream cool before mixing it with the eggs.  Once baked, let the ramekins cool in the fridge.  When you are ready to serve them, sprinkle a good layer of sugar (brown sugar is awesome - just sayin') atop the creme brulee and use a torch to melt the sugar, starting in the center and then carefully circling out to the edges.  Don't make your crust ahead, but the rest can be done a day or two in advance and kept in the fridge.

Use a sifter to sprinkle the sugar atop the creme brulee

Enjoy this and more with Blessed With Grace and Tempt My Tummy Tuesday.

Tuesday, July 31, 2012

Zucchini Bread - Tasty Tuesday!

So a friend of mine gave me a zucchini bigger than my arm.  I'm not joking.  I now understand why people joke about leaving zucchini on neighbors' doorsteps and then running.  Holy cats.  There was nothing to do but make zucchini bread, right?

Ginormous zucchini

So... 15 eggs later, I have 7 loaves of zucchini bread, and 96 mini muffins.  Or I did.  One loaf has been completely demolished.  Two loaves went home with a friend.  And another loaf has been started, plus several of the mini muffins have disappeared mysteriously.  It still is as good and as loved as it was when my mom used to make this for me as a kid.

The good news?  The wee ones love it.  And I don't think I need to make zucchini bread again for awhile.  Oh, and I'll be bringing some of those muffins with me to BlogHer, so hit me up if you see me!

Zucchini Bread

Ingredients:
2 eggs
1 1/2 c sugar
1 c oil
1 t baking powder
1 t baking soda
1 T cinnamon
1/2 t nutmeg
1 t salt
3 1/2 c flour
3 c shredded zucchini

Directions:
Peel your zucchini (or if you're my mom, don't, but I find the skin a little tough).  Cut it in half, and then use a spoon to scrape out the seeds and the spongy middle.  Use a food processor to shred the zucchini, or go old school and use a grater - just watch your knuckles!

Extremely large bowl of grated zucchini

My huge zucchini made this extremely large bowl of shredded zucchini.  You don't need nearly this much.  I like to shred my zucchini first so that some of the liquid in the zucchini can start to drain, as you don't need any extra moisture in the bread.  If you want to get fancy, put it in a colander, but I forgot, and this works just fine.

Preheat your oven to 325 degrees.  Add the eggs to your bowl, and beat until the yolks and whites are mixed thoroughly.  Add the sugar and beat until it is light and fluffy.  While the mixer is still going (but not too high), slowly add the oil.  You want it to incorporate as you're pouring and not have a big glop of oil you have to incorporate later.

Add the cinnamon, baking powder, baking soda, salt, and nutmeg.  Mix thoroughly to combine, then add the flour in two batches, stirring gently between each addition.  Add the zucchini, stirring just until it's incorporated.

Grease two loaf pans, and pour half the batter into each pan.  Bake at 325 degrees for 50-60 minutes, until a tester comes out clean.  Cool for ten minutes in the pans, then turn out onto cooling racks.  Cool thoroughly, then slice.  The bread freezes beautifully (I remember how much I used to love eating the bread straight from the freezer), and it will keep for several days tightly wrapped.  If it lasts that long.

Slices of zucchini bread

Enjoy this and more with Blessed With Grace and Tempt My Tummy Tuesday.

Tuesday, July 24, 2012

Roasted Garlic Aoli Salad Dressing - Tasty Tuesday

I'm not one to buy a lot of salad dressing at the store.  I love salad but don't eat enough of it.  And most dressing just don't taste as good to me as the homemade ones.  Plus, the homemade ones are just a teensy bit cheaper, and you can really make them your own.

My current summer favorite is a roasted garlic aoli.  This would actually make a perfect dressing for a potato salad, too, but I've been using it on a mixed green salad and sighing happily each time I take a bit.  I'll add whatever else is in my fridge at the time - tomatoes, cucumber, hard boiled egg, carrots, cheese, and more - and it's a perfect meal.

Did I mention this takes me ohhhh about 3 minutes to make (roasted garlic not included)?  Probably less, actually.

A homemade salad dressing is easy and delicious

Roasted Garlic Aoli Salad Dressing


Ingredients:
4 cloves garlic, roasted*
1 egg yolk
1 T dijon mustard (orrrr a little more - I never quite measure)
2 T sherry vinegar (balsamic will do in a pinch)
1/4 c grapeseed oil (or all olive)
3/4 c olive oil
1 T fresh dill
1 T fresh parsley
salt and pepper, to taste

Directions:
First, you need to roast your garlic.  You can do this ahead of time and keep it in the fridge for a few days - if it lasts that long!  Preheat your oven to 325.  Cut the top of the head of garlic just a bit. You want it cut so that you can see most of the cloves exposed, but you don't want to be cutting off much garlic itself.  Put it on some foil (seriously people, buying a garlic roaster is a waste of money) and drizzle it with a little olive oil and salt.

Make a sealed pouch with the garlic bulb, and place it in the oven, open clove side up.  Roast it for 45 minutes to an hour and allow it to cool.  Try not to drool as you smell the yumminess coming from your oven.  To remove the garlic, simply squeeze the bottom of the head and watch the cloves pop out.

For the aoli, add the egg yolk to a bowl and whisk it lightly.  Add the 4 garlic cloves, mustard, and vinegar, then whisk well.  While whisking, slowly add the oils.  If you start to see any drops of oil, stop adding it and whisk until it's fully emulsified.  You may not use all the oil, and that's fine.  Personally, I like mine just a little bit lighter.
Whisk together ingredients before adding the oil

Note how thin the stream of oil is and how fast it's being whisked

The herbs really give it life and flavor

Add the chopped dill and parsley, and salt and pepper the aoli to taste.  Serve it over your salad.  This will keep in your fridge for several days.  I don't know how many because I've always used it up first!  See, totally easy.

*Note that you are not under any circumstances to waste any of this delicious roasted garlic.  You can add it to so many things to make them extra yummy or simply go with my personal favorite (Little Miss loves it, too) and smear the garlic on some good fresh bread.  That includes rubbing the bulb on the bread after you've removed the garlic to get every last yummy bit out.


Enjoy this and more with Blessed With Grace and Tempt My Tummy Tuesday.

  © Blogger template 'Solitude' by Ourblogtemplates.com 2008

Back to TOP